

Body Care Advice
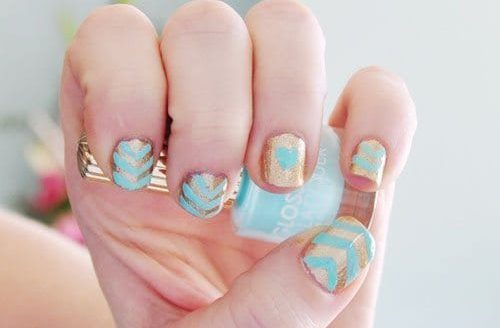
Be Still My Heart: Heart Burst Nail Tutorial
When inspiration’s going to hit, you never know. You might be walking down the street, talking to a hairstylist or taking an afternoon siesta. This nail layout came to me between my first sip of coffee and my crash, when I turned to my left in a daze and my eyes landed on a business card.
The layout featured a type of burst, with Marie Antoinette at the center (do you need dessert now?) . I thought to myself,”Self, it is possible to recreate that same burst 10 times on your very own fingernails.” And then I moved to my nail polish drawer, and the rest is lacquer history.
Instead in a contrasting color, I opted of the details of Miss Let Them Eat Cake’s visage. It’s possible to mimic the heart look or try something awesome like a scatter, star, swirl or anything motivates you. See how we came full circle ?
How to Do a Heart Burst Manicure
You’re going to need a minimum of three colors. I chose a nude, pink and purple.
Step One

After submitting nails and waiting to dry, paint one or two coats of your color. Wait a minimum of 30 minutes for the polish to dry. I love to wait an hour to stay on the safe side.
Step Two

Apply tape. I used striping tape (I found mine on eBay, super inexpensive in $1 for 10 rolls), but you can use trimmed Scotch tape. ) You will need four bits for every nail.
Step Three

Alternating every other space, paint the triangles your next color.
Measure Four

Wait at least 10 to 20 minutes. You are going to be left with this layout, which is actually pretty cool.
Measure Five

To make the hearts, I used a paintbrush to make two dots’ back end. You might even use tool , bobby pin or a straight pin.
Measure Six

Produce a V-shape beneath the 2 dots and fill in the center.
Step Seven

Await the hearts to dry and apply a topcoat to seal on your own design. Use a cotton swab dipped in nail polish remover to clean up the cuticles.

All Natural Beauty Products to Love